How to set up Google Analytics (+ add to your site)

If you’re looking to track the effectiveness of your website or blog, Google Analytics is a great, free online tool to use! I wrote a post of my Top 7 Reasons to Use Google Analytics on Your Website – this post will surely convince you why, but today you’ll learn how to set up Google Analytics.
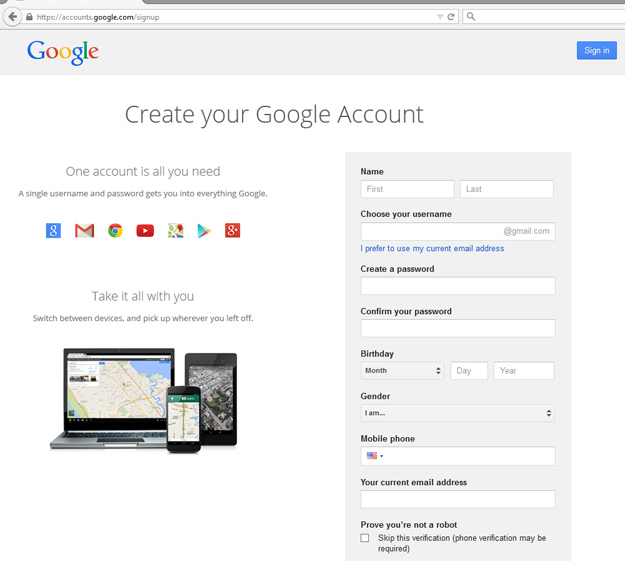
To setup Google Analytics, you must first setup a Gmail account. (Note: You used to be forced to have a gmail email, but now they allow you to use your own current email address.)
If you already have an account, login. If you need an account press “Get Started”. Fill out the google account form now or feel free to do it later.
Now that you’re logged in (you’ll see your email address in the upper right-hand corner), open a new tab in your browser, go to http://www.google.com/analytics and click on the SIGN IN TO GOOGLE ANALYTICS.

If you’re already logged into your Gmail account, just press “Access Google Analytics” and if you have never used this Google Analytics before, you will get an initial sign up screen (like this below).
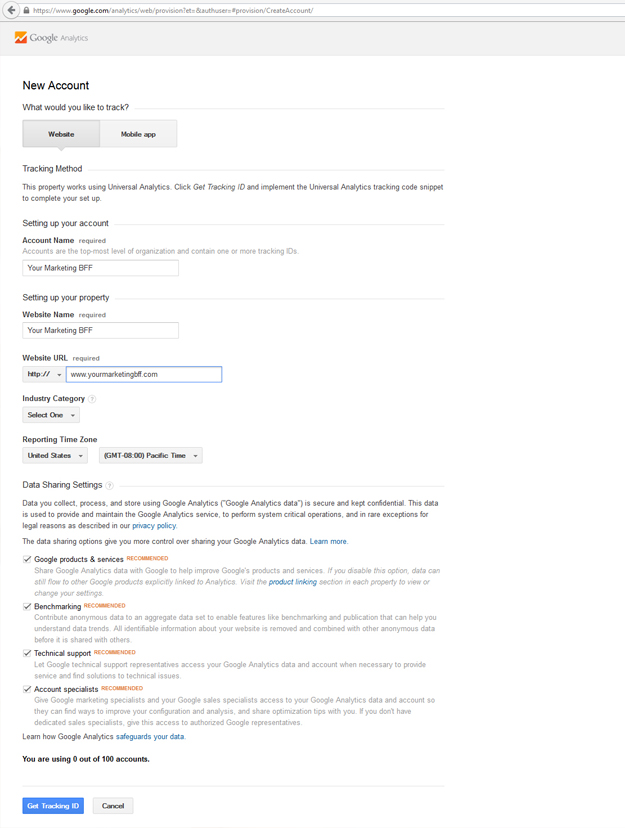
 Click on “Sign Up”! The next step is creating your Google Analytics property. One property manages one site. Note: you can create 100 properties in total. Which means this one account can manage up to 100 sites and their traffic for free!
 Fill out your property detail like the example above. Click on “Get Tracking ID”.
Locating your Google Tracking Code.
The next window will bring you straight to your tracking id code. Copy the tracking ID number you see on that page.
At this point, you have two options:
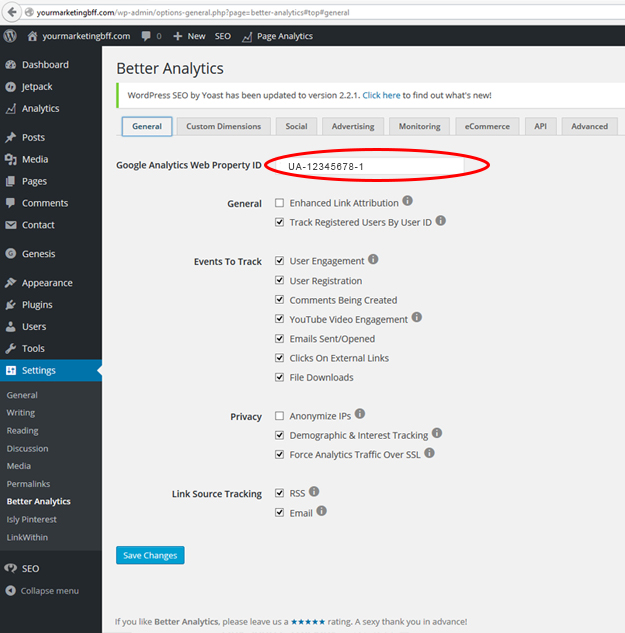
1. Go into your wordpress dashboard. Add new plugin ‘Better Google Analytics’ by Digital Point. Once activated, click on Settings/Better Analytics and place the tracking id where it says ‘Google Analytics Web Property ID’. Click save changes and you’re all set!


I loved this post Tana and I just completed it 🙂
Felt so tech you too!
My question is whether or not we need to configure the plug in? I have a “test setup/autoconfigure button.” Do I need to do anything there?
Yes, click on the “test setup/autoconfig button” to make sure it’s correct. Then you should be all set! Way to go girl!!!