How To Create A Clipping Mask For Photos In Photoshop

Have you ever wondered how people get artwork or photos to fit the shape of an object? In today’s tutorial, we’re going to show you how to create a clipping mask for photos in Photoshop.
Want to know how to get photos in the shape of texts, you can read my 5 Easy Steps To Using Clipping Mask With Text In Adobe Photoshop.
What is a clipping mask?
A clipping mask is an object whose shape masks other artwork (or photos) so that only areas that lie within the shape are visible – in effect, clipping the artwork to the shape of the mask.
In a nutshell, you’re basically clipping around the photo to “fit” the shape of the object.
Clipping masks are great for bloggers because you can create some beautiful custom photo layouts – that look professional and unique!
How To Create A Clipping Mask For Photos In Photoshop
Here’s my 5 easy steps to create a clipping mask with a photo in Adobe Photoshop…
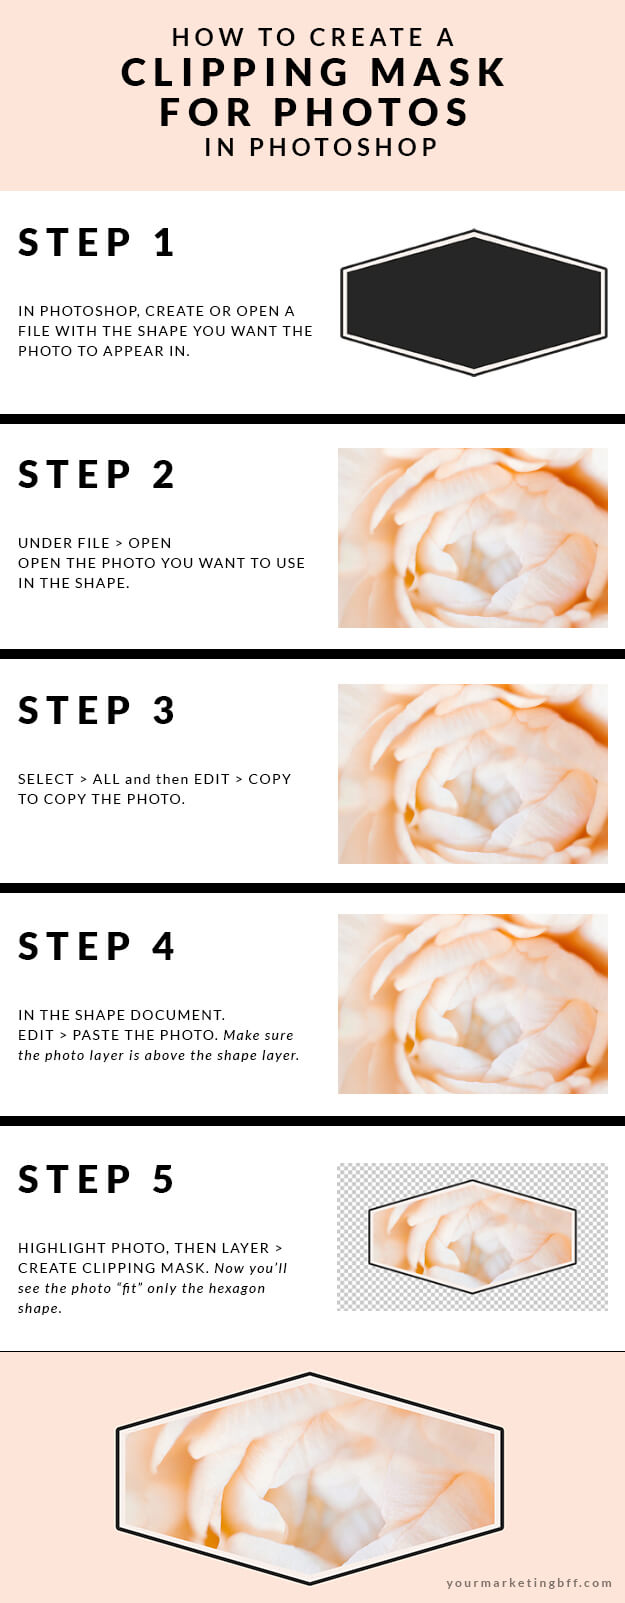
Step 1. In Photoshop, I used the hexagon tool to create my shape. Note: you can also start with any pre-made shape – a square, a rectangle, a circle, a star, etc.
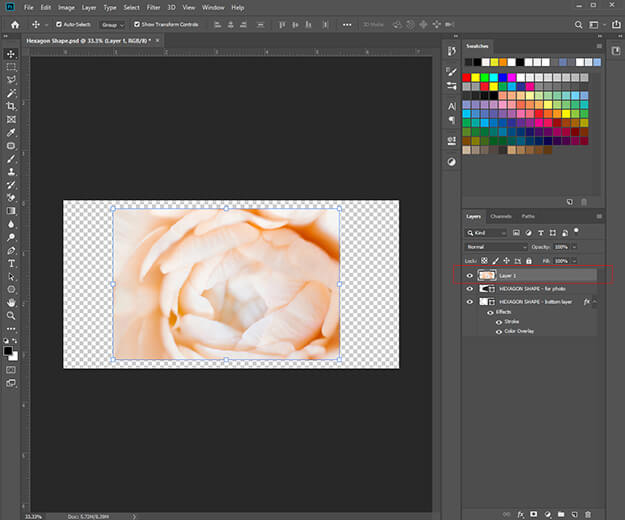
For this tutorial, I first created a blush hexagon (bottom layer) shape with a black stroke around it – just for fun + an extra design element around the clipping mask hexagon shape.
Next, I created a slightly smaller black hexagon shape for the actual area/shape that I’m going to have the photo fit into. It doesn’t matter what color the shape is, I simply chose black so you could see it easier in this tutorial.

Step 2. In Photoshop, under FILE > OPEN the photo that you want to use to appear in the shape. (I chose this peach flower photo).

Step 3. With the photo. SELECT > ALL and then EDIT > COPY.
Step 4. Go back to the shape image document. Then EDIT > PASTE to place the photo into this document.

Since we want this photo to take on the shape of the smaller hexagon it needs to sit ABOVE this layers panel.
You also want your photo to completely cover the shape that you want it to fit into.
Step 5: Click on the photo in the Window Layers area so that it’s highlighted, then LAYER > CREATE CLIPPING MASK. Now you’ll see that the photo “fit” only the shape of the smaller hexagon.


Voila!
Tip: Save your new image as a .png file format, so you can place the image on any colored background.
Here’s our newly created clipping mask with photo… placed on a peach colored background.

I hope you’ve enjoyed learning how to create a clipping mask for photos in Photoshop. Think of all the fun stuff you can create for your blog, blog posts and social media platforms!
And before you leave… Here’s a quick tutorial graphic I created to easily pin and share with others!


