How To Set up a Business Email Address using Gmail
 Last week I talked about how a number of email service providers are updating their DMARC policies and why it’s SO IMPORTANT to set up an email address with your own private domain.
Since I know a lot of you like using Gmail to read your emails, I thought I’d walk you through the steps of how to set up a business email address ending in a custom domain using Gmail!
- Sign up for Google Apps for Work. https://apps.google.com/ This is a cloud-based, premium service that costs from $5 /month per user in the U.S. (prices vary for other countries). Click on the green GET STARTED NOW button.
- Fill out the form.
 Confirm the domain you wish to use. Do you already own it, or would you like to purchase it through Google (domain prices start from $8/year)? If you haven’t purchased your domain, setting up your email address is really easy, and Google will configure it automatically. For those of you that already own your domain name, you will need to prove ownership. Input your domain name when prompted and hit NEXT.
- Create a Google Apps account using your domain name. Note: This will function as your business email address and your Google Apps admin account. You can also create new email addresses at a later stage.
- Create an email address that works for you, select a secure password and click the ACCEPT and SIGN UP button. Once signed up, you will see this screen (below):
- Create additional emails, if needed. For example, info@yourdomainname.com or sales@yourdomainname.com. Click on the START button. Note: It’s recommended that you add everyone using an email address at your domain during this step. When you’re done, check the checkbox then click NEXT.
- Verify your domain. This is an important safeguard to ensure that only the domain owner (you) can access Google Apps for Work on any given domain.
 Confirm the domain you wish to use. Do you already own it, or would you like to purchase it through Google (domain prices start from $8/year)? If you haven’t purchased your domain, setting up your email address is really easy, and Google will configure it automatically. For those of you that already own your domain name, you will need to prove ownership. Input your domain name when prompted and hit NEXT.
 Create a Google Apps account using your domain name. Note: This will function as your business email address and your Google Apps admin account. You can also create new email addresses at a later stage.
 Create an email address that works for you, select a secure password and click the ACCEPT and SIGN UP button. Once signed up, you will see this screen (below):
 Create additional emails, if needed. For example, info@yourdomainname.com or sales@yourdomainname.com. Click on the START button.
 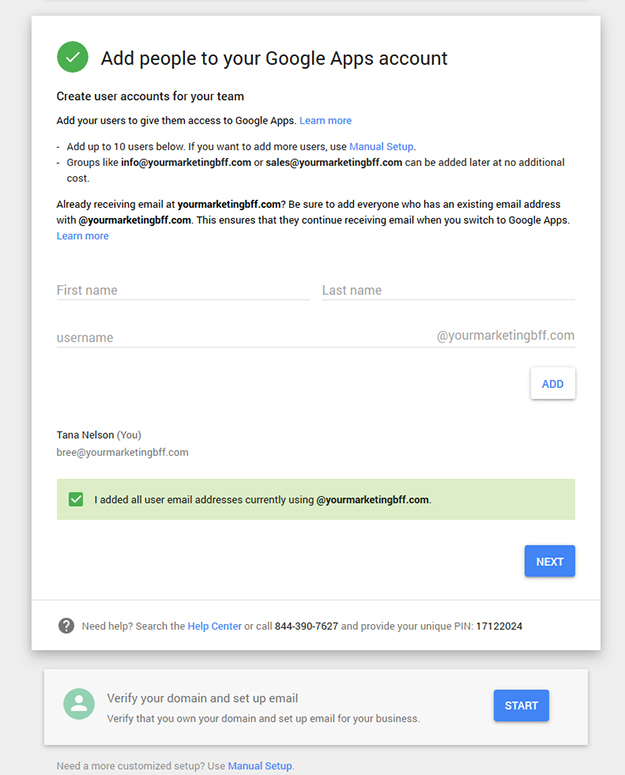 Note: It’s recommended that you add everyone using an email address at your domain during this step. When you’re done, check the checkbox then click NEXT.
The easiest way to verify your domain is to add a meta tag verification code to your site’s header.
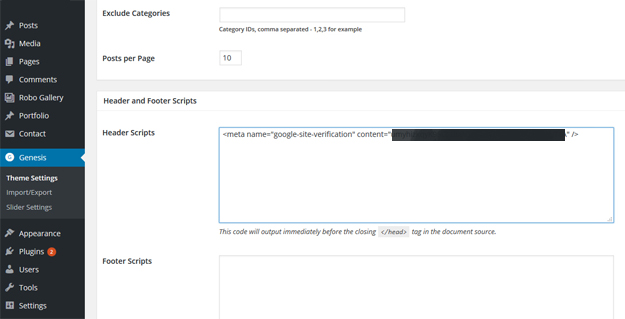
On the Genesis Framework? Login to your WordPress dashboard, go to Genesis/Theme Settings and scroll down to HEADER SCRIPTS and simply past the code here. Click SAVE. Now head back to Google Apps and check the “I added the meta tag to my homepage” box.
If you’re not on the Genesis Framework, login to your WordPress dashboard, go to Plugins/Add New/search for ‘headers and footer scripts’/Install Now/Activate Plugin. 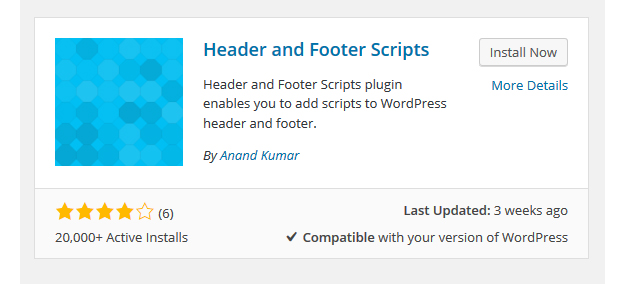 Then in Settings/Headers and Footer Scripts simply paste the code into the SCRIPTS IN HEADER section of the screen. Click SAVE. Now head back to Google Apps and check the “I added the meta tag to my homepage” box.
- Configure your domain’s MX records (in your hosting account). This will ensure your emails are sent to Gmail’s server, letting you use the Gmail service with your custom domain. Note: This process varies depending on your hosting account. You can find your host with detailed instructions on this page.
- Google will take a few moments to verify the domain. If you did everything correctly, you’ll see this screen:
 Configure your domain’s MX records (in your hosting account). This will ensure your emails are sent to Gmail’s server, letting you use the Gmail service with your custom domain. Note: This process varies depending on your hosting account. You can find your host with detailed instructions on
  Google will take a few moments to verify the domain. If you did everything correctly, you’ll see this screen:
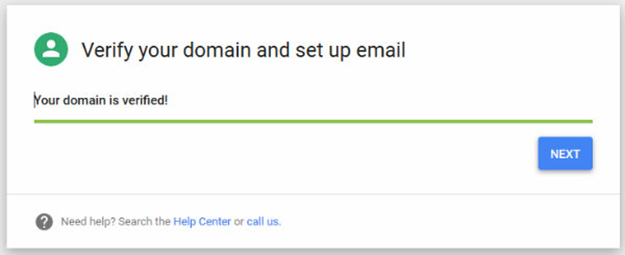
You’re done! YAY!!! Google will begin rerouting your new email to Gmail. Depending on your hosting provider, this can take up to 72 hours. Now you’ll be able to log in to Gmail using your business email address!
Side note: If you missed last week’s post about DMARC POLICY updates, you can read it here. This post will further explain why you should set up a business email address ending in a custom domain.
This is super cool. I have not set it up yet, but this invaluable information is exactly what I need for my start-up. Thank you.
I do use a my Gmail address for my business but it isn’t set up as a business account. Can I convert it and still use the email address I already have?
You’re unable to convert it, you actually have to create it (and verify that you’re the owner of the domain name) in order to use that business name as your email. The problem with the gmail email is that ANYONE can create one (hackers, spammers, etc.) – which has caused the email issue and the need for the DMARC Policy to be changed. 🙁