How to Hide an Image in a WordPress post (for pinning)
Did you know that long (vertical) Pinterest images get about 70% more repins than short (horizontal) Pinterest images?
Not only do long Pinterest-style images (aka a long pin) give you more real estate on Pinterest, but the higher percentage of repins means more blog traffic!
(If you don’t know how to make a long pin, next week I’ll have a “How to Make a Long Pin” tutorial)
While I do want vertical images on Pinterest, I don’t always want a long pin showing up in my post.
Why would you want to hide images?
Sometimes you might want to have long pin images as an option for pinning, but don’t necessarily like the way the long, text-heavy images look in a post.
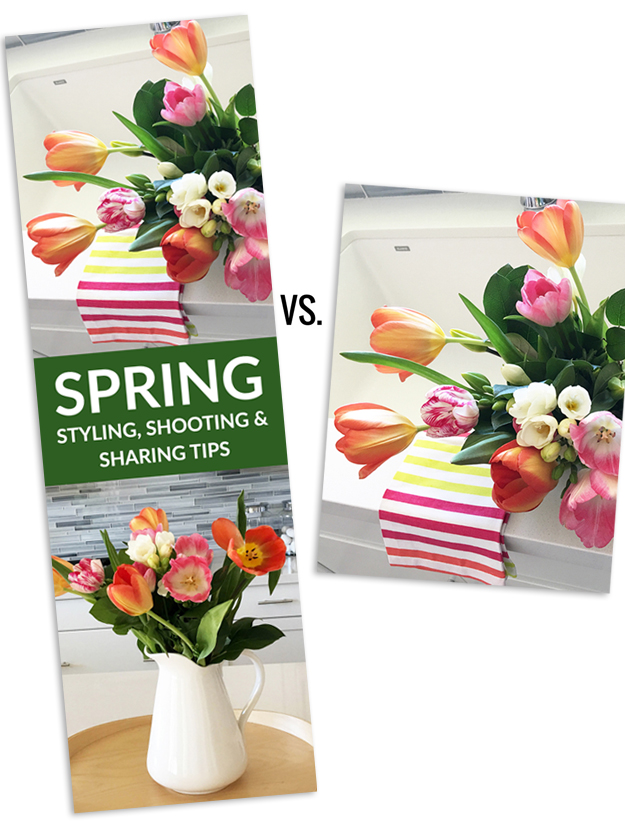
For example, I might want to write a post detailing my feminine + edgy brand style. The post could include a number of single images depicting these two styles. Showing all of these items as one long image would be awkward looking in a post, but perfect on Pinterest.

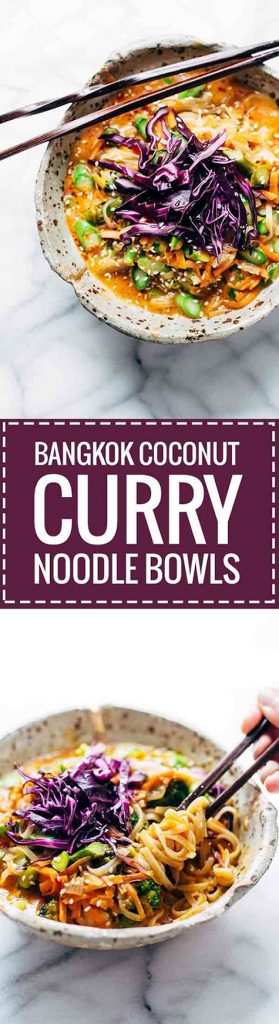
I see this a lot with food bloggers, they’ll have a post with a lot of single, text-free pictures. So hiding an image would be a great way to create a long one, with text, and not mess with the “flow” of their post.
And, since I get a lot of requests to explain how to hide an image in a wordpress post, I thought this would be a great time to share how easy it is to hide images (long or short) in your posts so that they are still pinnable. Note: Even though I say ‘long pin’ below, it can be a long or short image.
How to Hide an Image in a WordPress post
- Create your long pin image and upload it to your WordPress media library
- Copy the line of code below

- In your post (that you want to hide the image), click the “Text” tab and paste the code at the bottom of your post
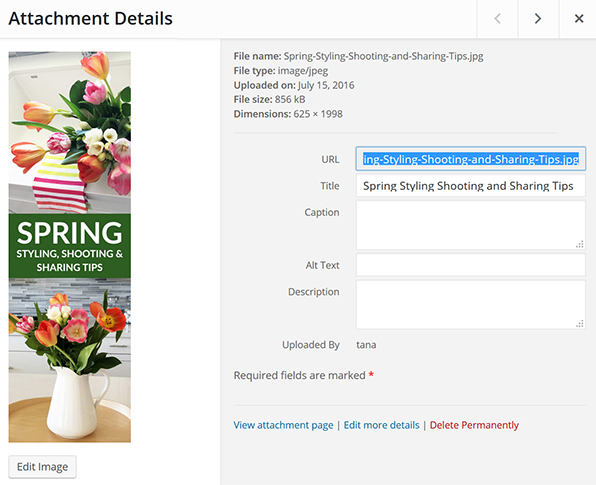
- Go to the media file (where it says ‘add media’ at the top of your post) and copy the link to the long pin image you have uploaded (see example below to find the link needed). Paste the link you just copied into the line of code where it says IMAGE URL HERE between the “ ”
- Add your description between the “ ” where the code says YOUR DESCRIPTION HERE. NOTE: this is the wording that will go along with your pin when it is pinned.

An example of what a completed hidden pin coding looks like:

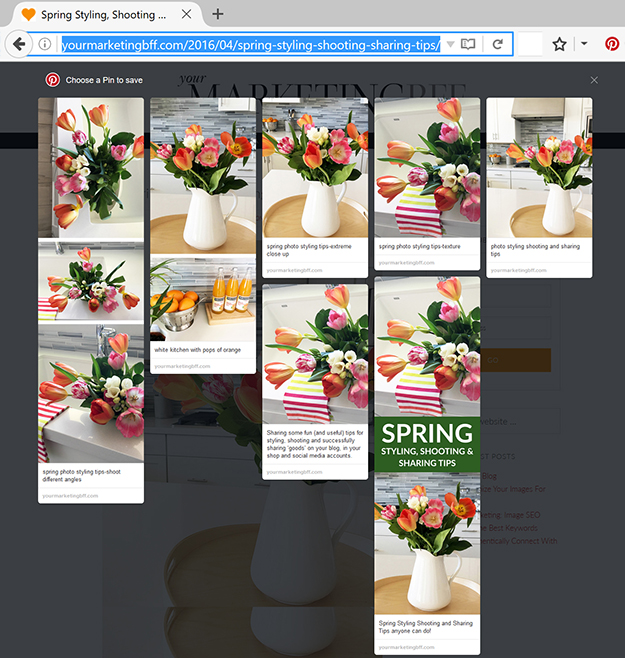
You will see that this post does not have the long pin image visible, but when you view the pinterest browser button, you see it appears.
How to add the Pinterest browser button?
I use Mozilla Firefox as my browser, but you can add the Pinterest button to any browser. If you go to this link, you’ll get instructions on how to add the Pinterest button to your browser of choice.
Why?
This allows you to go anywhere on the web and in this case a particular blog post and have ALL images within that blog post come up as an option to pin…not just one image at a time.
*Image sources: Feminine + Edgy and Bangkok Coconut Curry Noodle Bowls
Save
This is amazing!!! I just started making an effort to create more long pins and have been tacking them at the bottom of posts. I can’t wait to try this- how did you read my mind?!
The funny thing is… I just read one of your recent blog posts this morning and I saw your long image at the bottom and said, “Oh, Kel’s going to appreciate my blog post today!” haha. We are on the same wavelength!!!
That’s what I thought to do as well because I’d seen other bloggers do it. Thanks for making us look like pros, Tana! xoxo…
Smooches… oh yeah, an you are a pro already!
I’m with Kelley! I’ve been dying to know the answer for the longest time! Thanks for the info, love!??
Then you’ll have to read my reply to her. haha. I’m so glad that this ‘trick’ is timely and will come in handy for y’all. xo
This is awesome, Tana!! Thanks so much for the info…you’re always right on time:)!!
I thought to myself… I wonder if this will interest anyone? I’m glad I was spot on, even if it was by accident. haha
I’ve seen these on Pinterest and wondered about them for a while. So glad you wrote this post!
Thanks for reading. Yeah, pretty cool trick, huh! xo
This is great information. Thanks so much.
So glad you like it Debra! xo
This is great! I’m going to start using it on some of my shopping/collection posts. Thanks for the tip. https://eemmllee.wordpress.com/
Excellent! This would be great on those types of posts!!!