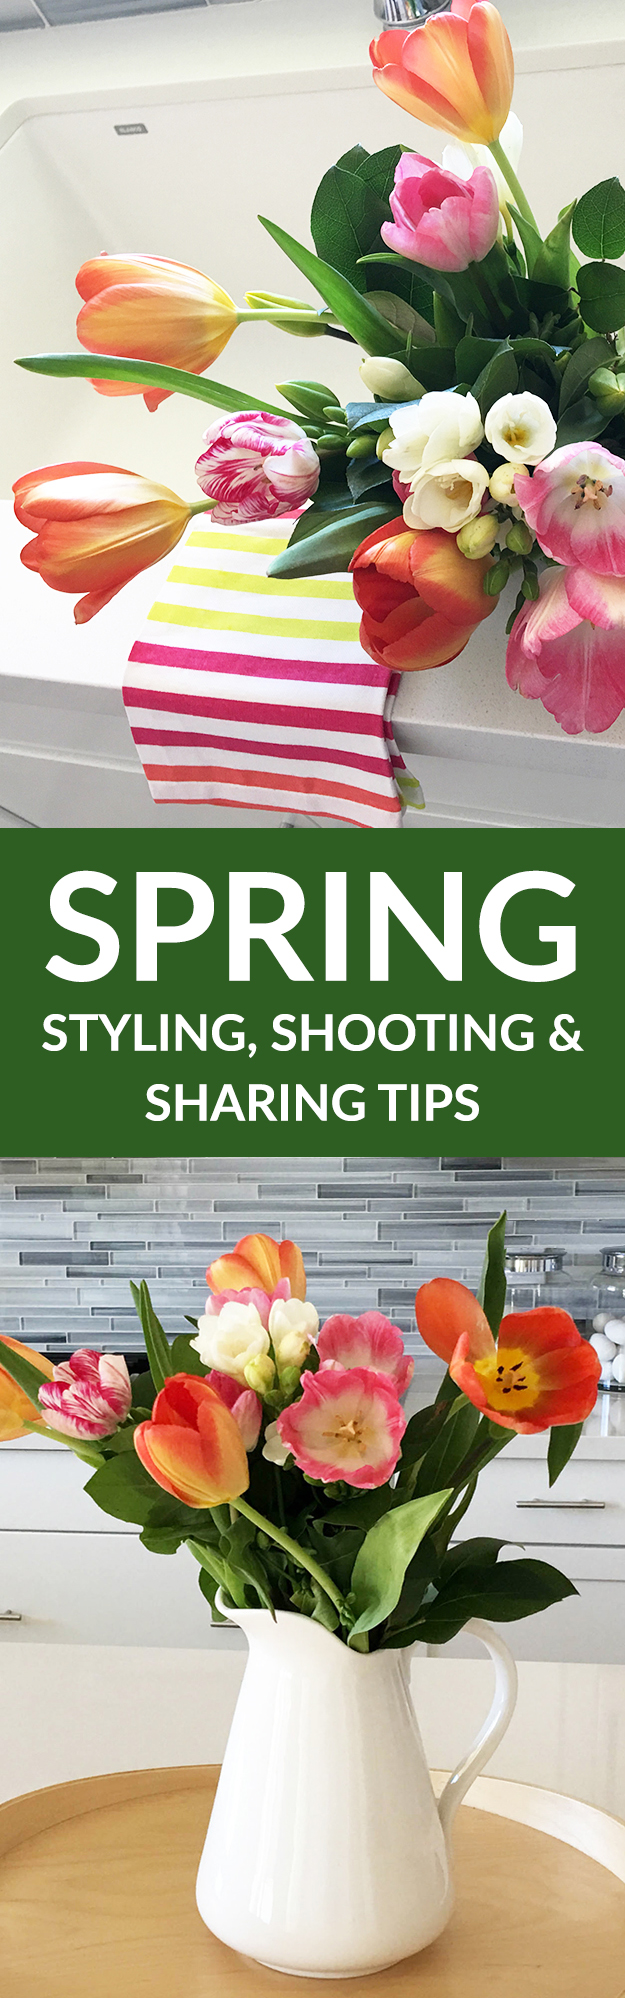
Spring Styling, Shooting & Sharing Tips

Whether you’re photographing your chic outfit of the day, the caprese bruschetta you ate for lunch, or the spring décor added to the kitchen in your home, you really can style, shoot and share images like a pro.
Today I thought it would be more fun (and useful) to share some tips for styling, shooting and successfully sharing ‘goods’ on your blog, in your shop and social media accounts.
It’s always a good idea to CREATE A THEME (that’s tip #1) and infuse the latest trends, colors and season into your photography in order to keep things fresh and relevant to your audience today.
So let’s get started with my Spring Styling, Shooting and Sharing tips!
- Create a theme.
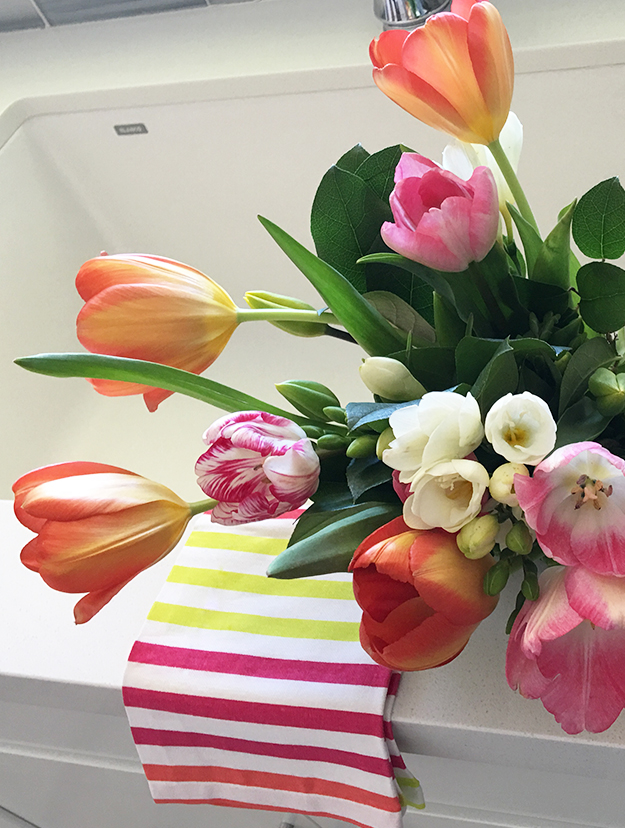
Even if you’re focusing on a beautiful vase you want to show off (and sale), showing a related item will add that extra something to your photo. I love how simply adding fresh Spring flowers to the vase can add the perfect touch to create a story and add a pop of color into the photo – generating vase sales today.
Note: This allows people to visually see what you’re selling and ways to use it. It also tells your audience that they can have this EXACT look in their own home! It’s a win for your readers and a win for you too!
STYLING
- Cohesive color.
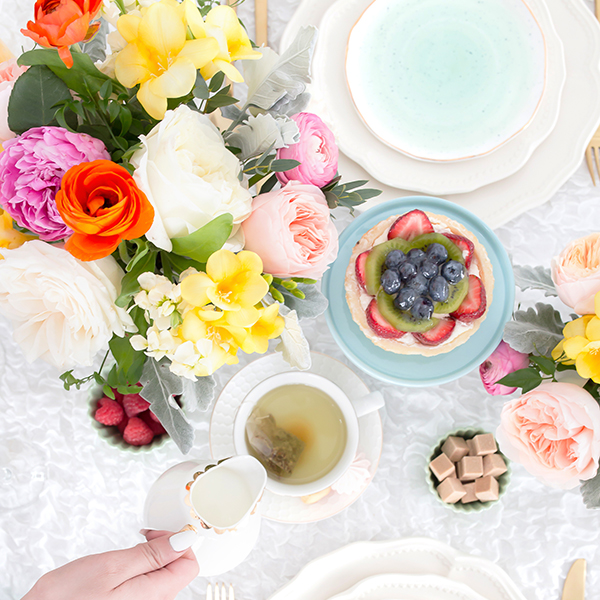
Pick a color palette to weave throughout the image(s). In the pics below, you can see I’ve woven pops of orange in the gorgeous bouquet of fresh flowers, a strainer/bowl holding navel oranges and a display of clementine sodas. It helps the image and item you’re selling to look more cohesive and visually harmonious. Note: Bright colors are always the most eye-catching!

- THREE is the magic number.
Actually anything in odd number groupings of 3’s, 5’s and 7’s looks better. Trust me, it just does!
- Don’t be afraid of texture.
Rather than using a plain white background for all of your photos, don’t be afraid to play with cool textures like napkins or towels, wood or metal trays, and even blankets or fur. Fun textures will add a cool touch to your photos and also help add to the story you’re trying to tell.
- Add elements from nature.
Flowers, plants, branches, rocks, coral, seasonal fruits… you get the idea. Things from nature like oranges, the flowers and plant from Trader Joe’s seen in this post, breathe life into your images.
- Organization is key.
When photographing, make sure that you have the entire frame of your photo together before you actually shoot it. Make sure that everything is clean, no visible trash on the ground, or anything that might be distracting (it sounds obvious, but just make sure). As I always say… It’s all in the details!
SHOOTING
- Natural lighting makes a HUGE difference.
Lighting may seem like such an obvious thing, but not everyone understands just how important it is when creating gorgeous photos. To get the best results, photograph in natural light.
Whether this means heading outside or shooting near a window in your home, study the light and where it’s brightest. Choosing your shot locations and the time based on natural light can make the difference between a swoon worthy photo and one that’s just okay.
- Shoot from different angles.
Shoot from a bird’s-eye view, straight on, at a 45 degree and at a corner angle to see which angle works best for the product and/or space you’re shooting. Instagram seems to be huge fans of the birds-eye view (aka flat lay), and as the shooter, you eliminate shadow problems!

- Visualize the grid (rule of thirds).
You should create well-balanced compositions that look and feel right to the viewer. I explain focusing on the main subject/item and secondary items using the grid system in How The Rule Of Thirds Can Improve Your Photos, so read more about that here.
- ECU (extreme close up).
Sometimes only a portion of the whole is enough to tell the whole story. You don’t have to see the entire flower bouquet (for example) to get a sense of what you’re looking at. Sometimes a ‘snippet’ is all you need!
Note: I like to shoot the entire subject and then crop off the sides a bit to create a more enticing photo.
SHARING
- Know your platforms.
Vertical images perform better on Pinterest, square images work best on Instagram. Often times horizontal images work best on blogs because they mimic the shape of the monitor/screen (plus there’s less scrolling). So take into account WHERE you’ll be sharing your images.
Note: I like to take an extra step back to shoot my image – this way I can crop it to be a vertical, horizontal or square photo.

- Variety is the spice of life.
If you’re sharing on your blog, Instagram, Facebook or Pinterest, try and keep some variation in your feed. For example, if you post an ECU shot on Instagram, try and post a broader scene shot the next time, and a different angle shot another time. This will keep your audience engaged!
- Hashtags.
Be sure to add hashtags, play in different hashtag series (like #BrightWhiteWednesday – one of my personal faves) or create your own hashtags for personal projects.
I hope my Spring styling, shooting and sharing tips have inspired you to step your picture taking and sharing up a notch or two!
Psst… insert any theme or season along with my 13 tips and you’ll look like a pro in no time!
Today’s post comes with an added treat! I’ve teamed up with some of my talented, highly-creative friend’s to provide you with additional spring ideas + inspiration. Click on the links below, you’re going to really enjoy this!


Tana, these tips are fab! And, I am so loving that these were taken in your gorgeous new home. I am dying to go get some orange now- stunning!
Thx Kel. Yep, this time of year: oranges, lemons, limes… they’re cheap (free from neighbors) and gorgeous!
Tana, amazing tips! You are such a pro! I love your kitchen – I need to see more of it! Thank you for always sharing your wealth of knowledge!! xo
Trust me, you’ll be seeing a lot more of my new kitchen… and the rest of the house (once the furniture arrives). haha
Great idea for a post!!! So helpful. I LOVE your new kitchen. Looking forward to many more shots in it! Thanks so much for the #BrightWhiteWednesday shoutout!
It’s just so ME! Many more shots in the future f’sure!!!
I love all of these tip! Thanks so much for the #BrightWhiteWednesday love!
Thanks girl,
?Leslie
@thelesliestyle
So glad Leslie. And of course, I love #BrightWhiteWednesday. xo
What wonderful tips!!! I know I’ll keep them in mind from now on when shooting photos for Instagram. (And, by the way, I am thrilled that you love #BrightWhiteWednesday!! ‘Til tomorrow—?!)
Thx Kate! ‘Til tomorrow ?
Look who is a pro at design posts!!! Great job Tana! Love your kitchen, can’t wait to see it in person. xo
Haha, I learn from the best!
Love these tips! Thank you!
You’re so sweet! Thx for reading… xo
This is a very informative post. I will certainly be using these tips. Another good one.
Thanks so much Debra!!!! Can’t wait to see some upcoming shots.
Dying over your kitchen (and those tulips), Tana!! And don’t even get me started on those gorgeous floors? And thanks as always for another great, tip filled post:)). So excited to be doing this fun spring tour with you!!
Not to discount the kitchen or the tulips, but… these floors are gorgeous! Ceramic wood plank tile floors are the BOMB!!! Ditto – so fun!
Drop dead beautiful, Tana! Love your new kitchen and the tips are right “on-point” as usual. And, love the links to the other blogs! Great all round post!
Thanks Carole! A fun way for me to share the new kitchen plus play with my talented blogging friends. So appreciate your support friend!
Such great tips Tana and your photography is gorgy my friend!! You make those sodas look pretty darn good too! 😉 Loving the peek inside your beautiful new home too! This was so fun doing the spring link with you!!
Seeing your soda, I think I should have shot mine crouched down and at a 45! haha. Such a fun Spring link up. xo
Great tips Tana…as always! Love your beautiful kitchen and those tulips are stunning. Gorgeous colors! So fun doing this spring tour with you! xoxo
Oh my goodness! So pretty. Your images are so beautiful and I am loving the colors together!! Spring perfection ?
Thanks Mollie! I love fresh flowers in the Spring time. Well — actually ALL the time! haha
Great post ! I love the tip of the “three” ! Definitely gonna use it in my next pictures!
Claire
It makes a big difference. Can’t wait to see how your ‘next’ pictures turn out!
Great tips & gorgeous blooms Tana! It has been so much fun doing this Spring tour link up with you!! 😀
Ditto Laila! So fun…
I love the tips of 3 also! My mom taught us girls that at an early age and I still laugh when I’m decorating because I can hear her say it 😀 These were all such helpful tips, Tana! Loved this post AND LOVE YOUR new KITCHEN!!! {squeal} So excited for you! xoxox….
The new kitchen is coming along. Glad you like the tips of 3! Your mom was a smart woman, lol.